
 A couple of weeks ago The Crazy Elephant shared a fun project using broken crayons on her blog, that she recently did with her son. She made cute upcycled crayons using the old, broken, ruddy ones that seem to multiply ten fold in the craft box when on one is looking. It's a great summer boredom buster that kids can be ultra involved in!
Start by collecting all the old crayons ... odds and ends, bits and pieces from the craft drawer, leftovers from the school, everything that's lost it's interest to play with. When we made them, everything got thrown in the mix, Crayola, RoseArt, freebie crayons from restaurants, fat, skinny, washable, glow in the dark, princess, you name it we used it. Eac
 h has their own unique melting qualities, and that made for some fun added dimensions when looking at the end product. But we are all really pleased with the results.
Next, remove the paper wrapper around each crayon and sort by color. Cereal bowls or custard cups work really well for this step. Depending on how many crayons you want to upcycle, sort by exact color, by similar color, or don't sort at all, and create a multi-colored rainbow crayons. Let your child experiment with it. Have them make predictions about how the crayon combination will look after they are melted.
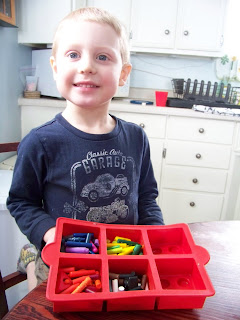
The Crazy Elephant and I both used silicon molds, because they come in great shapes and make removing the crayons a snap! The Crazy Elephant used a Lego muffin mold and I used a star mold. But metal cupcake pans also work well.
I baked ours at 350 for about 15 minutes and then let them cool for a couple of hours, a friend using a metal pan melted hers at 350 for 10 minutes and years ago when Family Fun had this idea in their magazine they said to melt them at 250 for 15 minutes. I think it all depends on the kinds of crayons you are using, how big your molds are (FF's was no bigger than 2", and mine 2.75"), the brand of crayon you are using, and possibly the pan (silicon vs. metal?). So turn on your oven light and watch them closely. It takes them a while to cool enough to remove from the pan, so plan a trip to the library or the pool to make the waiting period easier!

Upcycled crayons are not only fun to make, but they are also fun for kids to use and make great gifts and party favors for birthdays, stocking stuffers, Valentines, or little extras in care packages.
If you're looking to purchase chunky crayon shapes to use for an upcoming party, EtsyKids Team Member, PreschoolDoll Designs, has lots of whimsical shapes to go with your theme, and individually wraps them, making them perfect party favors!
Thanks to The Crazy Elephant for this great project. Please check out her Etsy shop and blog!
2 comments:
Thanks so much for the mention! I will share a "trade secret" and let you know how long I bake mine. Rather I use silicon or metal cupcake pans, I bake them all at 200 degrees {although silicon takes longer to heat up and melt the wax}. I have a brand new oven, and this works well for me. If you leave them in too long, you will notice more of a clear wax ring that rises to the bottom. Also, if you use a metal pan, wait until the pan is no longer warm to the touch, and pop them in the freezer for a few minutes. They pop right out! However, if you plan on packaging them {for a gift, etc.}, wait until the crayons are room temp again, and then place them in your packaging! Also, to make label peeling go faster, place the crayons on an old cutting board and slide a box cutter down each one. Have fun, mommas! It's a messy job, but the results can be so cool!
I like the box cutter idea! We have a special box for collecting broken crayons now, so that they are all in one place when the time comes to make more crayons. Thanks for sharing my project! I hope everyone has fun working on it with their kiddos : )
Post a Comment