Hello 2012!!

Posted Saturday, December 31, 2011

Happy New Year to all our team members and blog readers!!!


For 2012 we have so many wishes and hopes. As a team we want to grow and welcome new members and make the Etsykids team bigger and better than ever!
We want to wish all the luck and success to our team members and hope you continue to work together as a team, so that we can make 2012 the greatest year yet!

EtsyKids Design Challenge: We have a Winner!

Posted Thursday, December 29, 2011

This month we have a tie!!
Congratulations to the winner's of our Decembers's challenge, bisongirl & thatmoxiegirl!!

bisongirl sells some amazing and colorful booties for babies! Keep those little toes warm this winter!

thatmoxiegirl has lots of other nightlight designs in her etsy shop too, and also some other nursery items.

It looks like everyone had great fun designing and creating owl an friend themed items for this months design challenge. We had some lovely items entered and thank you to everyone who participated and voted, especially during this busy seasonal period.
Next months theme will be announced in the coming weeks.

Thank you letter printable

Posted Saturday, December 24, 2011

Courtesy of Steffi of Toastie Studio

I have to admit I am terrible at sending out thank you cards after Christmas. Half the time I send them out so late I should just ring and say thank you.
This year I saw in the shops some thank you cards for kids and knew I wanted to design my own. I think having a fun design and letter format can make writing thank you letters more fun for kids! So here are two designs for a thank you printable.
You get two letters per sheet of paper. Simply print at 100% scale and trim down.
Download: Red GirlBlue Boy

I also have other thank you card printables in my etsy shop, including ones like this where you can design the character and colour scheme yourself.

Easy Holiday Truffles

Posted Friday, December 23, 2011


I love making sweets during the holidays, and this year, I decided to make mostly truffles and cake pops. I’ll be starting with these recipes, which are two of my favorites: Oreo Truffles and Chocolate Chip Cookie Dough Truffles. Add a lollipop stick for a fun treat!

Oreo Truffles
This recipe comes from a friend in my MOMS Club. Super, super easy. Start them now, and they’ll be ready to eat in just a couple of hours.

16 oz. package of Oreo cookies, crushed in food processor (or in a Ziploc bag with a wooden spoon)
8 oz. package of cream cheese, softened

Mix the cookies and cream cheese together. Form into balls (I used a melon baller for size), and place on wax paper on a cookie sheet. Freeze until set. (I left mine in about two hours.)

Melt chocolate (white or semisweet), and dip the frozen truffles into the chocolate. While the chocolate is still soft, decorate with sprinkles, colored sugar, etc. – a great way for kids to help out!


Cookie Dough Truffles
This recipe comes from Spare Time Baker, the blog of a talented baker friend. I recently started following her on Pinterest, and the baked goods she shares there are just sinful! These truffles are always a hit, and my son loves them because I let him try the raw cookie dough. No eggs!

1/2 cup butter, softened
3/4 cup packed brown sugar
2- 1/4 cups all-purpose flour
1 can (14 ounces) sweetened condensed milk
1 teaspoon vanilla extract
1/2 cup miniature semisweet chocolate chips
1/2 cup chopped walnuts (optional)
1-1/2 pounds semisweet chocolate candy coating, chopped

Cream butter and brown sugar until light and fluffy. Add flour, sweetened condensed milk, and vanilla; mix well. Stir in the chocolate chips and walnuts, if using. Shape into 1-inch balls; place on waxed paper-lined baking sheets. Loosely cover and freeze for 1-2 hours or until firm. (The dough softens quickly at room temperature so it works best if they are frozen, not just chilled in the refrigerator.)

In a microwave safe bowl, melt candy coating, stirring often until smooth. Dip balls in coating; place on waxed paper-lined baking sheets. Refrigerate until firm, about 15 minutes. If desired, melt remaining candy coating and drizzle over candies. Store in refrigerator, not that they’ll last that long!


(Thanks to my friend WB for this awesome photo.)

Now, try to limit yourself to just one. Or two.

Happy holidays!

Eco-Friendly Gift Wrap

Posted Thursday, December 22, 2011

Courtesy of Danni of Alphabet Emporium.


How many rolls of wrapping paper do you have stashed in the back corner of the closet, or in a plastic tub under the bed?  Birthday, baby shower, wedding and holiday paper - a different roll for each event, each theme.  It's expensive and not all city recycling centers will take glossy gift wrap.

EtsyKids Team member, Alphabet Emporium, has a couple of simple, genius ways to wrap packages with eco-friendly supplies; many you can put into practice this holiday season.


  1. Use 100% recycled butcher paper (craft paper).   It works for every occasion, is totally gender neutral, and a 200 yard roll wraps a lot of packages!  At $6 a roll (hardware section of your local Wal-mart), it's hard to find anything more economical.  Butcher paper is a great eco-friendly alternative to wrapping paper and is very versatile, creating a beautiful canvas for Christmas wrapping.

    Have your children help you decorate the presents by coloring or painting the paper.  Embellish the boxes by splurging on gorgeous ribbon, using wide strips of burlap or fabric, or multiple strands of string or yarn.   In lieu of gift tags, stamp the recipients initials or name all over their boxes.
  2. Not everything comes in a box, or fits in a box, and for those items gift bags are essential.  If you want to be extra eco-conscious, buy material from the local craft store and sew draw string bags to use over and over again.  I stamped bags with the numbers 1-25 and place some of the bags on the tree as decorations.
  3. I like to embellish my gifts with gifts, a kind of teaser that will get the recipient excited about what's inside.  So if the gift is a cookbook, buy a set of measuring spoons and string them through the ribbon you are using to embellish the box.  Or say it's a gift for someone who likes to sew; you can buy a measuring tape and use the actual measuring tape as ribbon.  For my son (see packages wrapped in picture above) I used an infinity scarf (middle package - red) I made, a mask (top left), my daughter get's hair accessories (top right) and some felt food (middle - red strawberries).  There are endless ways to embellish gifts with little gifts, and with a little forethought and a pinch of imagination, you'll come up with the perfect little addition. 
When done simply and done well, eco-friendly gift wrap is a chic way to personalize each gift you are giving in an extra special and individualized way with being easy on the pocket book and the environment.  It's that extra step that makes a difference.

A huge thanks to Danni of AlphabetEmporium for sharing her tips with us.  You can find Danni after the holidays on Etsy at AlphabetEmporium and on facebook.

EtsyKids Design Challenge: It's time to Vote!

Posted Wednesday, December 21, 2011

It's time to vote for your favorite item! Voting will be open until December 29th, and the winner announced on December 30th.
This month, EtsyKids members were challenged to create an exciting new item based on the theme "Owls and Friends". We received a bunch of fantastic entries from some talented people! 
Please note your favorite from the list below and place your vote. You can also view each entry in detail by clicking on items image or HERE.

Celebrating Winter

Posted Tuesday, December 20, 2011


In addition to celebrating Christmas, my family carves out a little time each December to mark the Winter Solstice, the first day of winter. Many years – like this one – the Solstice falls on my son’s birthday, so we celebrate it the day before or after. This year, the Winter Solstice is Thursday, Dec. 22.

The first day of winter is the shortest day of the year. Gradually, until the Summer Solstice in June, the days will get longer and longer. Ancient peoples celebrated this time of year because they knew the light was returning. It gave them hope for the spring.

We find inspiration in the changing of the seasons throughout the year. After the chill and growing dark of fall, we look forward to the return of the warmth and green of spring, even though there’s a lot of winter yet to pass. Celebrating Solstice keeps our family in tune with the natural patterns of the Earth.

Here are some of the ways we mark Solstice in our home. There are lots of ways to get kids involved.

Feeding the Birds. There’s little for birds to eat in the suburbs during the cold winter months, so we set out bird feeders. This year, we’re using pinecones collected throughout the year and covering them with peanut butter and birdseed. They’re hanging in the tree in front of our house.


Sharing with Others. We also make it a point to share with others, and the past several years, we’ve done this on Solstice by taking some of our holiday cookies to our neighbors. It’s fun to visit with them and see their trees, and we get to know the people in our neighborhood.

Look for Winter. If the weather cooperates, we like to walk around the neighborhood with our son and look for signs on winter: bare trees, snow, winter birds and animals, etc. It’s also a fun time to check out the decorations on our neighbors’ houses.

Decorations. A Yule log is the centerpiece of our Christmastime table. We light it before dinner and talk about the good and bad things that happened in the past year and the goals we have for the new year. Regrets from the past year are burned in a burning bowl. Our son is about to turn 4, and last year, he was able to participate in this part of the day with us by talking about what he thinks are the blessings in his life.


Special Food. Much of what we eat on Solstice is inspired by the sun. The past several years, we’ve ordered pizza for lunch – it’s round like the sun! For dinner, I cook the same thing every year. We’re vegetarian, so the main dish is a Quorn roast in an orange-garlic juice marinade (recipe below), but the original recipe calls for using the marinade on turkey. I serve a winter salad of spinach, oranges, dried cranberries, and walnuts with a balsamic vinaigrette dressing, and we enjoy cookies for dessert. I also like to make mulled wine (Gluvein) or cider.

After dinner, we each get to open one small gift, usually something associated with light or winter.

Orange-Garlic Marinade
(Modified from The Wicca Cookbook)

1c orange juice
1/4c butter, melted
3-4 cloves garlic
Salt and pepper

Combine ingredients, and pour over meat substitute or meat. Use a brush to baste occasionally.

Cosmetic Bag Tutorial

Posted Monday, December 19, 2011

Here is a great quick last minute handmade gift idea!
Cosmetic Bag Tutorial Shared by: Nana Brown's


I love it when I find something great and get that bolt of inspiration that fuels me and keeps me creating.


I was wandering around a shop in town and saw these fabulous placemats. It was love at first sight, but we don’t use placemats on our kitchen table. Instead, I had a vision of something fabulous and useful instead, a new cosmetic bag. My old one has been with me for more years than I can remember and is in a very sorry state. It needed replacement and I was inspired - what a great combination!


I bought several placemats made with all kinds of different fabrics and interfacing. I found the easiest ones to work with had lighter interfacing in them, otherwise it makes it too hard to get the zipper in.


Here is an easy tutorial to make your own cosmetic bag from a placemat.
Placemat Cosmetic Bag Tutorial


If you love the way they look but do not want to make your own they can be purchased in my Etsy shop too.


To visit more from Nana Brown's: Shop & Blog

Kanzashi Flowers Tutorial

Posted Sunday, December 18, 2011

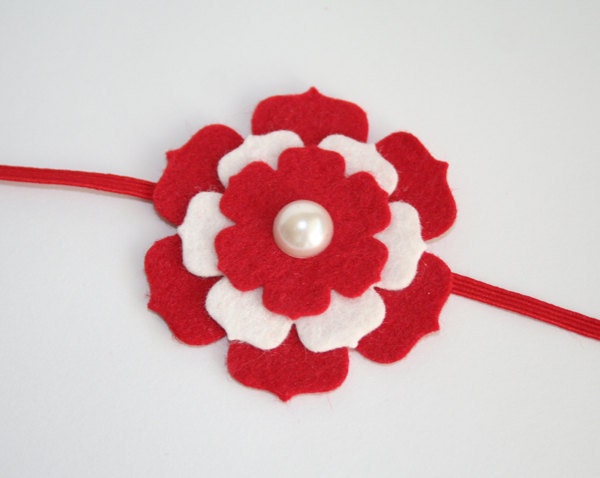
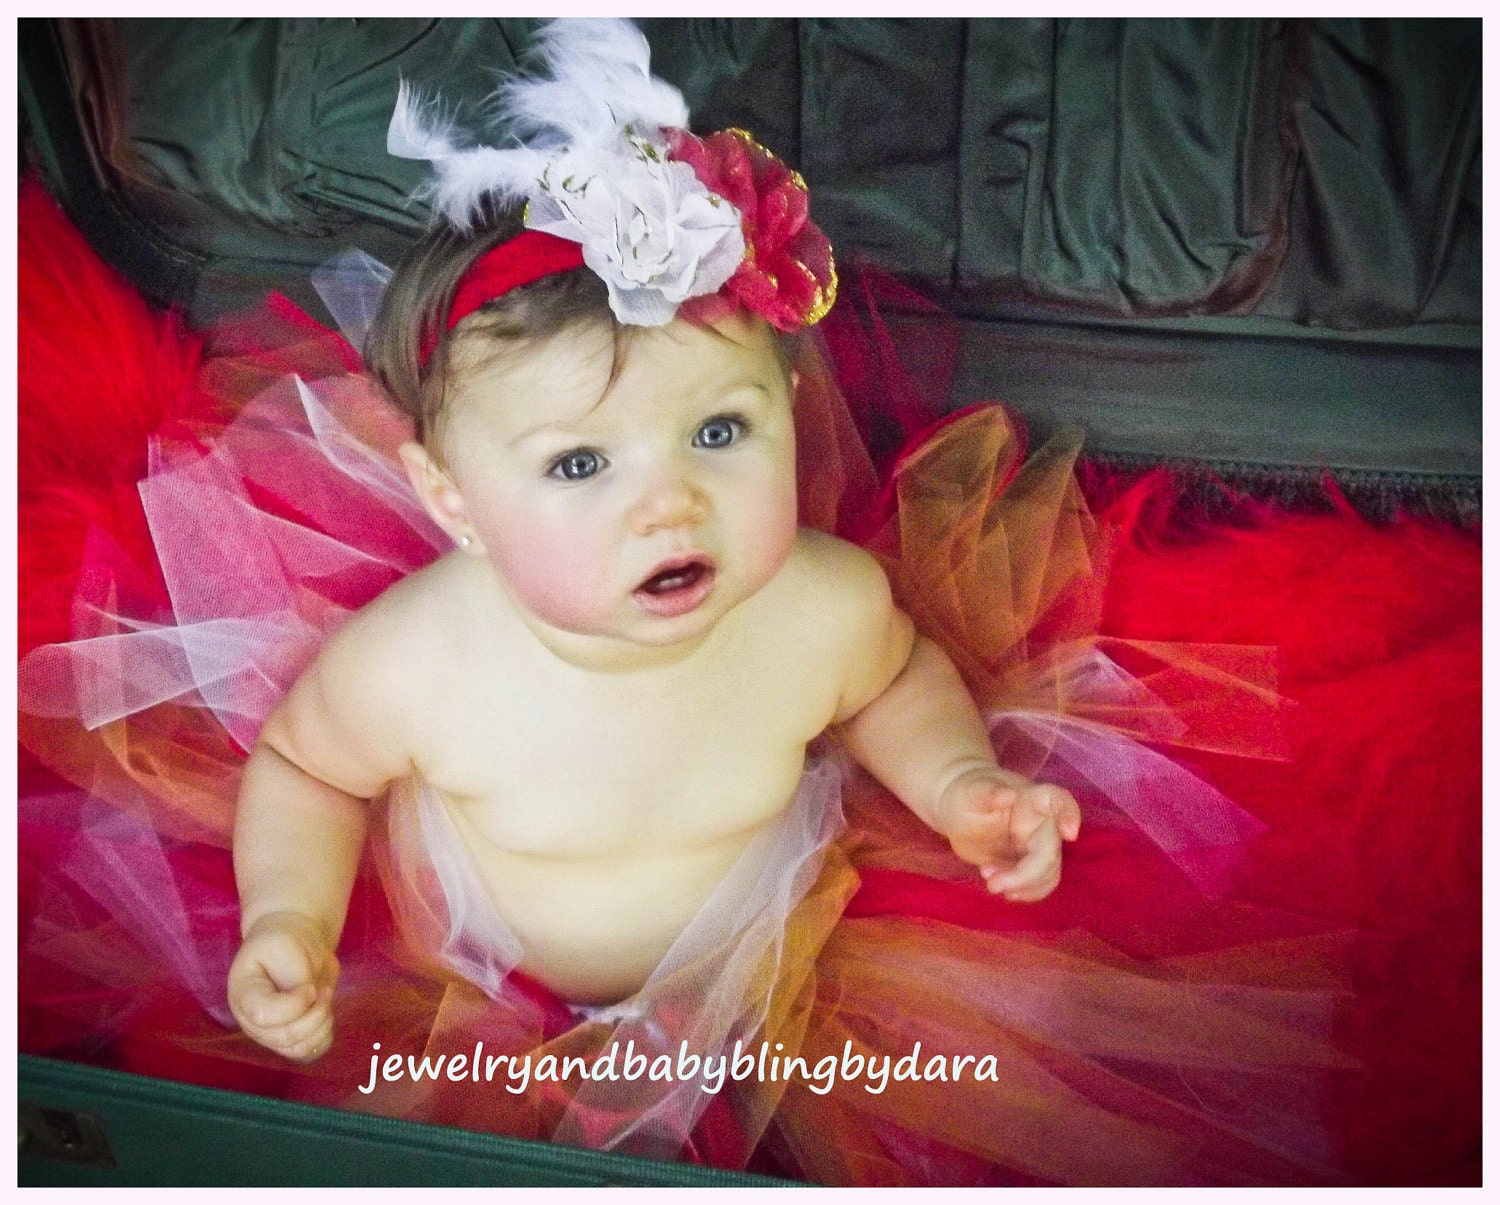
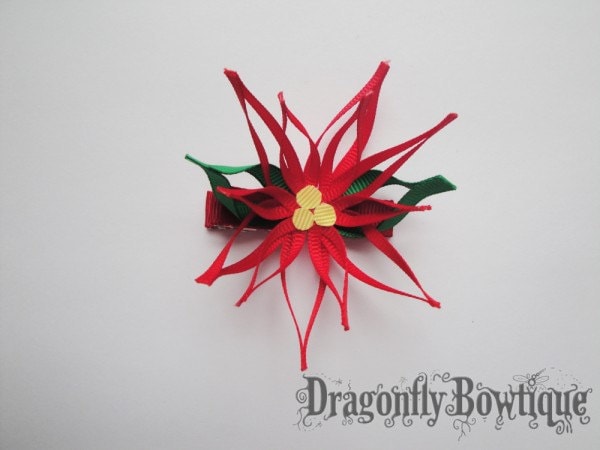
Kanzashi flowers are a Japanese art form that are traditionally made with honotai silk.  Kanzashi are typically worn as decorative hair ornaments in traditional Japanese hairstyles. Use your kanzashi flowers on hair clips or headbands as they were traditionally worn by geishas. Or put them on hats, jackets or tshirts. You can also make kanzashi flowers out of paper. Make a sweet bouquet or wreath.


Fabric (preferably a woven one that is thicker material)

Scissors or rotary cutter

Ruler or cutting guide

Iron and board

Straight pins

Needle and thread

Hot glue gun or fabric glue

Buttons, beads, embellishments


Cut your fabric into 4" squares. I recommend 3" ones if your going to use them for girl's hair accessories, but I'm making mine to embellish hats. Each square is one petal of your flower and each flower needs 5 petals.


Use your iron to press each square in half to make a triangle.


Next you're going to fold your petals. You will want to have your pins close by. With the top of your triangle pointing away from you, fold the left corner up to the top, bisecting it in half.


Then fold the right corner up to meet the left one, making a smaller square. Holding those folds in place, flip your new small square over keeping the raw fabric edges facing away from you so it is oriented like a diamond.


Fold the left and right corners evenly towards each other so that they touch and meet in the middle.


Fold the fabric together from right to left, sandwiching the points in the center.


Use a straight pin to push through your petal sandwich in the center, making sure to catch the 2 points in the middle.


Repeat the process until all your petals are folded and ready.


Using a sharp pair of scissors, cut the raw edged tail off of your petals. You want to cut close to the pin, but not exactly on top of it. Do not remove the pins yet.


Using your first cut petal as a guide, cut the rest of your petals so that they are the same length.


Use your needle and thread to sew 5 petals together. You want the needle to pass through where your pin is, so that it runs through all the folds and the center points sandwiched inside the petal. Remove the straight pins as you insert the needle.


I usually stack all 5 petals on the needle at once to keep the petals folded and then use a pair of pliers to pull the needle through all the layers of fabric. Then tie a knot to secure a loop of thread. You do not want to tie your loop tightly, otherwise you will not be able to position your petals and open them up properly.


Move your petals around so that they are in a flower shape. Use your thumb to press open the outer point of each petal.


Using your hot glue or fabric glue, put a small amount of glue between each petal to keep the petals from shifting around too much when in use. I also put some glue into the center of the petals from the back side of the flower. Next use a button, beads, covered button, or other embellishment to attach to the center of your kanzashi flower. I sew beads onto felt cut with pinking sheers for these flowers.


I'd love to see pics of what ever you make. Email them to thatmoxiegirl@gmail.com

Shared by: That Moxie Girl
Etsy shop: www.thatmoxiegirl.etsy.com


Facebook: www.facebook.com/thatmoxiegirldesigns

Blog: www.blog.twocrazypirates.com

Make Your Own Fabric Labels

Posted Saturday, December 17, 2011

Giving handmade is an important aspect of the Holidays for many EtsyKids Team members.  We are making gifts, purchasing from local stores and purchasing from many of our EtsyKids Team friends in order to have a handmade holiday.  


Recently, EtsyKids Team member, SnugglyMonkeyCo, shared a tutorial on how to make fabric labels.  How perfect the holiday season!  Her simple instructions will make it easy to create custom labels to put on your handmade gifts ... like a scarf for dad, tea towels for grandma, skirt for sister, blanket for baby.    


Ouchie Pouch Hot / Cold Therapy Pouch

Here are Claudia's instructions:  Whether you are making something as a gift or a new item for your shop, I think these labels are the perfect finishing touch for a handcrafted item. Enjoy and please let me know if you have any questions!

What you need:
  • Sew-on Printable Cotton Fabric Sheets
  • Printer
  • Heat-n-Bond Iron On Adhesive (see notes below for which kind to get)
  • Ruler, Cutting Mat, Rotary Cutter (Or Fabric Scissors)
  • Iron


Step 1: Design
Start off by designing your labels with your favorite word processor/photo editing software. If you haven't checked out Picnik yet, you should! It is a fantastic photo editing site with lots of cool features, and the best part is that the free part of the site can often times be all that you need.

Once you have your design, decide how big you want your labels to be and then lay out the labels using your word processor onto an 8.5"x11" standard page.  For example, my labels are about 2" wide by 0.5" tall. I set my page up in the Landscape orientation and have 4 columns with 14 labels in each column, so I get a total of 56 labels per page. 

Step 2: Print 
Grab your Printable Cotton Fabric Sheets. You can buy these at your local fabric store (look in the "Quilting Notions" area). Typically, they cost about $10 for 5 sheets. There are lots of different brands available. You can usually find them in either white or beige, sew-on or iron-on. Pick whichever color you think would work best with your design.  For this tutorial I use the "Sew-On" kind, but you could use the iron-on sheets and skip steps 3 & 4. I will say that from my own experience, the iron-on sheets do not have as strong of a bond as the Heat-n-Bond will give you. That is why I iron on my own adhesive instead. 


Follow the directions on the package for printing out your labels and heat setting the ink. If you are going to be putting your labels on something that can be washed (such as a quilt or clothes), I recommend following the instructions for colorfasting the fabric sheets as well. 

Step Three: Iron-on Adhesive
I find it difficult to keep my labels exactly where I want them on my items when I try to stitch them on at this point. So, I like to put some iron-on adhesive on the backs of my labels first. Then, I iron the label in place and topstitch. I find that this helps me get a nicer, cleaner look in the end.

Once your fabric sheet is ready to use, grab your Iron-on Adhesive. You have two options with Heat-n-Bond: Sewable (Purple package) or Ultra-Hold (Red package). If you only want to Iron On your labels with no stitching, then go with the Ultra-Hold.

If you want to topstitch your labels in place, go with the Sewable. Do not sew through the Ultra-hold - trust me - I learned this the hard way. You will get adhesive inside your sewing machine, and it will screw up your bobbin tension or worse. (And the money you are saving by making your own labels will go to getting your machine repaired!)


Cut an 8.5"x11" piece of the Heat-n-Bond and following the instructions on the packaging iron it onto the back of your labels.

{Tip: Put an old t-shirt down on the top of your ironing board before you iron on the adhesive. That way if your label sheet and the adhesive sheet do not exactly line up, the excess adhesive will get on the old-shirt instead of our ironing board cover. And, your husband won't get upset when he goes to iron his work shirts and ends up with an ugly, sticky glue mark on his shirt....}

Step Four: Cutting Your Labels
The final step is cutting out your labels. I find it easiest to do this with a rotary cutter and ruler, but it is also possible to do it with regular fabric scissors as well. I am just a bit challenged at cutting nice, neat straight lines with a scissor, so I use the rotary cutter. 


Once you have your labels cut out, all you need to do is iron them on to your item and stitch them in place.
Eye pillows with removable covers. 

A big thanks to Claudia for sharing her tutorial with us.  Whether you are looking for a new ID Badge Reel or Lanyard to dress up your work wardrobe, an Eye Pillow to help you relax after a long day or an eco-friendly Ouchie Pouch (Hot Cold Therapy Pack) for your little one, you will find all of these and much more at SnugglyMonkeyCo!  You can see more of Claudia's tutorials and see examples of her work on her blog.
   

3 Simple Holiday Crafts From 1 Snowflake Punch!

Posted Friday, December 16, 2011


Shared by: Nikki, In Stitches


Christmas is coming...fast.

Faster than I think I'm ready for!

And if you're like me, you're starting to realize you have way too many things to do, and not nearly enough time to get them all done.

This is crunch time!

Time to keep things simple. Time to get the most out of every minute.

The kiddos and I sat down earlier this week with a pile of scrap paper and a few yards of ribbon, some glitter paint, and a Martha Stewart Snowflake paper punch. Less than 45 minutes later, we had three projects complete...and that's what I call getting the most of every minute!

We decorated our ornament tree.


We made garland and draped it around the trees on our front porch.


And we made super cute ornaments, that could also double as the perfect "little something extra" to embellish your gift wrapping...all from that pile of scraps and one punch!
I'm sharing the super simple how-to's for the ornament tree and garland on All Things For Mom today, here. Stop by and take a peek!

The snowflake ornament how-to is below!

Enjoy,

Nikki, In Stitches

Materials:

*3/8" wide ribbon

*Scrapbook paper

*Glitter paint and paint brush (optional)

*Snowflake paper punch (The one I used is from Martha Stewart...and is probably on sale in your local large chain craft store right now!)

*Needle and thread

Directions:

1. Cut ribbon into 6" lengths. Fold over approximately 1 1/2" and use needle and thread to tack into place, creating a loop to hang your ornament.

2. Punch 5 snowflakes for each ornament. (We painted a few pieces of paper with glitter paint first. It's fun for the kiddos to just glob the paint on, and the brush strokes will dry clear! Just make sure your paper is completely dry before you punch your snowflakes!)

3. Use the needle and thread to attach your snowflakes to the ribbon!

PS...There's still time for more handmade holiday projects! Find even more inspiration in my ebook, Nikki, In Stitches - A Handmade Holiday! Here's a little peek at what's inside!

EtsyKids Design Challenge for December: Owls and Friends!

Posted Wednesday, December 14, 2011

"Owls and Friends" is our challenge theme for December, picked by our last month's winner tzburps.  We will feature an abundance of Owl and woodland friends items for kids.  All hand made by our talented team members!

Owl Plushies by tzburps

EtsyKids members will have until Decebmer 20th to submit their entries, and voting will be open to everybody from Wednesday, December 21st to Thursday, December 29th. So, be sure to come back to the EtsyKids blog for a new post on the 21st to see all of the entries and VOTE! In the meantime, please click here to get a sneak peek at some exciting entries so far!

Bulletin Board Tutorial


Bulletin Board Tutorial Shared by: Nana Brown's

Here is a great tutorial to give as  a gift or to update your corkboard and hang your Holiday cards!


We finally got rid of all the old, beat up, college dorm style furniture from our home office. I am so excited to have an actual grown up desk that looks really nice and works the way I need it to. 

Our old desk was quite tall and took up a bunch of the wall space. I had pictures and favourite quotes taped on it in various places where I would see them when I looked up from working.

The new desk is all one level which left me with a big, blank open space right above the computer monitor. It was really not very inspiring and I missed looking at my pictures. I looked at it for a few weeks and decided something had to be done so I enlisted my daughter to help me make a custom bulletin board for the space.
I was honestly not sure how it would turn out because we had never tried anything like that before. 

We made 2 different bulletin boards. One hangs in my office above my desk and the other one hangs in my bedroom beside my bed. Both are filled with pictures, quotes, aspirations, inspirations, artwork from my daughter and other things I love to look at.

The project turned out really well and was easy and inexpensive too. It was easy enough for my 3 year old daughter to do and fast enough to keep her attention from start to finish (not including the drying time).


Supplies
1 framed, unpainted cork bulletin board in your desired size
Black acrylic paint
Little dish or plate for paint
Foam brushes
Glitter Glue
Spray adhesive
Piece of fabric the same size as the cork part on one of the bulletin boards

Directions
1.       Prep the bulletin board by taping around the frame to keep the paint off the cork. 


2.       Paint the frame of the bulletin board black on the front & sides. My daughter had a great time helping with this. Allow to dry.

3.       For the glitter glue board pick your favourite colors and make a pattern with the glue on the black frame. Allow to dry.

4.       Spray frame with clear acrylic sealer. Allow to dry.

5.       Remove tape and hang up your new bulletin board.

6.       For the fabric bulletin board, after the acrylic paint has dried, spray the frame with clear acrylic sealer and allow to dry. Remove the tape.


7.       Cut your piece of fabric to the same size as the cork part of the bulletin board. Try to get it as close to the same size as possible.

8.       Following the instructions on the can, spray the cork board with spray adhesive and leave the time recommended for it to get tacky. Try not to get it on the frame – it will make it sticky until it dries.

9.       Starting on one side and going slowly, smooth the fabric, right side up, onto the cork board. It is like putting on wallpaper, go slow and try not to get any bubbles between the fabric & the cork. I used a ruler to do this so I could make sure I got it all stuck down with no bubbles. It did take me a few tries so if it doesn’t work quite right the first time, be patient and try again.


10.   Once it is all pressed down the way you like it, allow it to dry according to the instructions on the can. We left ours to dry overnight to make sure that it was good and dry.

11.   Hang it up and fill it with your favourite things.


To visit more from Nana Brown's:  Shop  &  Blog

Christmas Star Tutorial

Posted Tuesday, December 13, 2011

Post Shared by: Juny and Milo

My grandmother Teresina celebrated her 90th Birthday on December 6 and is probably one of the eldest EtsyKids Team fans. Having been an avid crafter for all her life and loving kids, she likes to browse the EtsyKids-Blog with me every time.


Because of her age and her hands not being as good as they have been, we’ve had to adapt our own crafting a bit and make it easier. For Christmas in the past years, we have always made paper stars, big and small, which we used to decorate just about everything.


This is my grandmother’s favorite model, which she is happy to share with the EtsyKids community. We never found out who the inventor of the star was, we learned it from a friend of ours who had noted it down on a piece of paper. It looks great, yet is very easy to make on your own or with the kids. Made in a big size it adorns walls, in smaller versions it makes a Christmas tree decoration, it can be used for garlands, and once, instead of paper we used plastic sheets and then sprayed the star with silver glitter for an outdoor decoration. It also looks beautiful crafted in felt.


I have included a step-by-step tutorial for you with photos, just follow the link. The star may look tricky, but after the first element you’ll continue making them in your sleep. It’s almost as relaxing as knitting.


The candy cane version is made using red and white striped paper, so simple, yet it looks cheery and festive.


Wishing you all a warm, happy and joyful Holiday Season,

Teresina, the grandmother

and

Nikky of http://www.junyandmilo.etsy.com/

EtsyKids 12 Days of Christmas Giveaway Extravaganza! Day 12

Posted Monday, December 12, 2011


The Grand Finale is here!!  To celebrate the end of the 12 Days of Christmas Extravaganza, we will be giving away nine prizes to three lucky winners.

Second Prize:

1. Bard Designs


Congrats to the winner gibson fam!

First Prize


3. Aunty Ann Designs -(This shop is also offering 15% off, so even if you don't win, you can save on some great toys. Just enter ETSYSALE15)


Congrats to the winner frawggie!

Grand Prize:


Congrats to the winner jheimyg!

Thanks again to all participants and and to all of the shops that donated their wonderful items! Winners will be notified shortly!


To Enter:

Required Entry: Visit Bard DesignsJewelry Baby Bling DaraSweet Child of Mine KidsDragonfly BowtiqueAunty Ann DesignsLeigh and Michael, Stitchin' Netkazvijezda, and Big Bridge Studios on Etsy and add the shop to your favorites. Leave a comment on this blog telling us about your favorite items from these shops (leave a separate comment for each shop). With so many adorable items to choose from, it shouldn't be too hard to find something you love. Leave your Etsy username and e-mail address in the comment so we can contact you if you are the lucky winner.

Bonus Entries:
Rules:
  • Entries will be accepted from 12:00 AM (EST) until 10:00 PM (EST)
  • Open to U.S. residents only ages 18 +.
  • Winners will be notified via e-mail. Failure to respond within 48 hours will result in prize forfeiture and a new winner will be drawn.
  • Each comment counts as an entry, so you need to leave separate replies for each entry method and each shop. 
  • The Required Entry must be completed. Bonus entries will not count unless the required entry is completed.
  • Entries must be made as a comment to this blog post only. Comments on other posts, blogs or Facebook pages will not be counted.
  • Entries will be verified, and any entries not meeting requirements will be discarded.
  • Winner will be chosen by random.org
  • Be courteous, and have fun!
  • By entering, you are agreeing to be bound by these rules.
Related Posts Plugin for WordPress, Blogger...